Connect HT-M01 to a LoRa Server
Summary
This article aims to describe how to connect HT-M01 Gateway to a LoRa server, such as TTN, ChirpStack, which facilitates secondary development and rapid deployment of LoRa devices.ff
Before all operation, make sure the HT-M01 is runing well with a Raspberry Pi (Linux) or Windows computer. If not, please refer to this HT-M01 Quick Start document.
Connect to TTN
Register a LoRa gateway in TTN
Create and active an account in TTN. Select Gateway in the console page.
Fill in the HT-M01 information as shown below and complete the addition.
Gateway EUI – The unique ID of HT-M01 gateway;
I’m using the legacy packet forwarder – Must select this;
Frequency Plan – Must matach the LoRa band configuration (
global_conf.json) in HT-M01.Router – Must use the default router allocated by TTN system.
Tip
That four points are the key to success connection with TTN.
Connect to TTN
In the HT-M01 gateway, need to configure the gateway ID, server address and port.
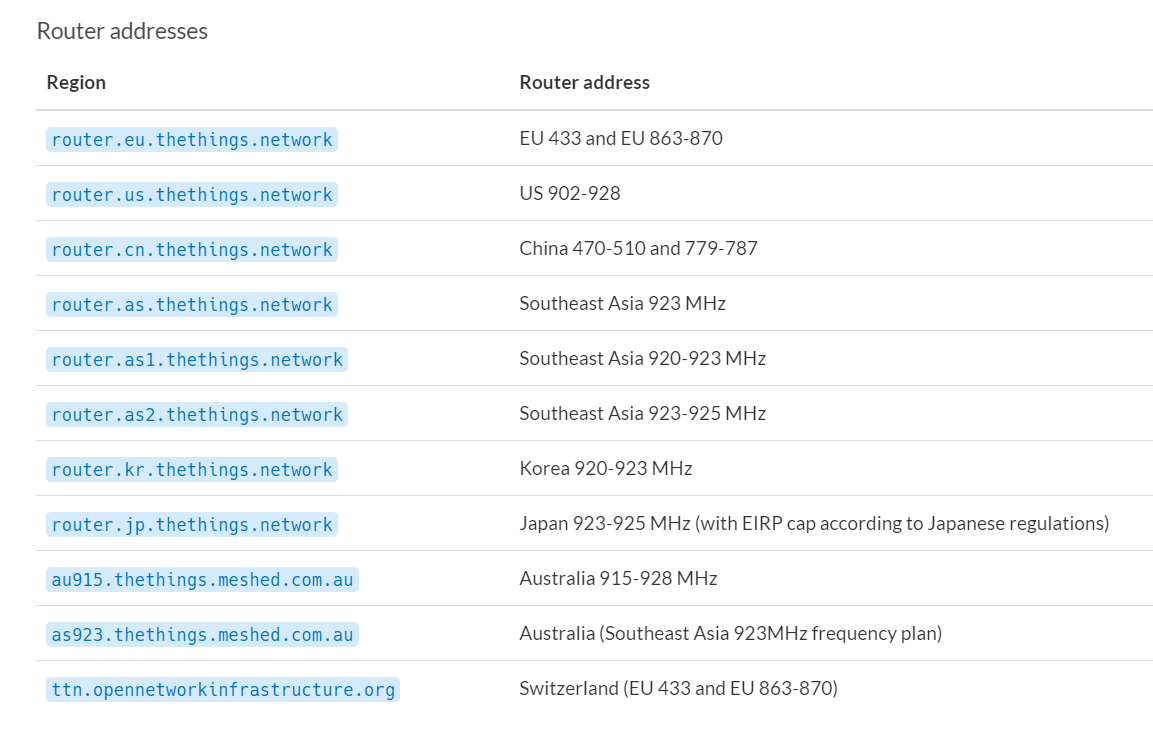
The TTN’s router addresses for different region:
https://www.thethingsnetwork.org/docs/gateways/packet-forwarder/semtech-udp.html#router-addresses
HT-M01 in Linux (Raspberry Pi)
Fix parameters in global_conf.json:
nano /home/pi/lora/packet_forwarder/lora_pkt_fwd/global_conf.json
Configure gateway ID, server address, port. At the end of the global_conf.json, make these changes:
"gateway_ID": "XXXXXXXXXXXXXXXX", /*Your gateway ID, 16 characters*/
"server_address": "router.cn.thethings.network", /*The router addresses need matach your region*/
"serv_port_up": 1700,
"serv_port_down": 1700,
ctrl + O to save and ctrl + X to exit, and restart the service in Raspberry Pi:
sudo systemctl restart lrgateway
HT-M01 in Windows
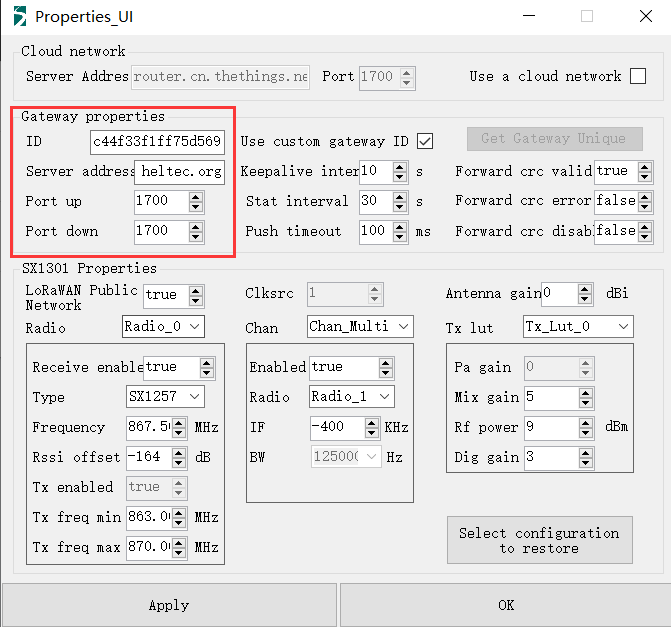
Select Use a cloud network, and fill in correct server address, keep Port default 1700.
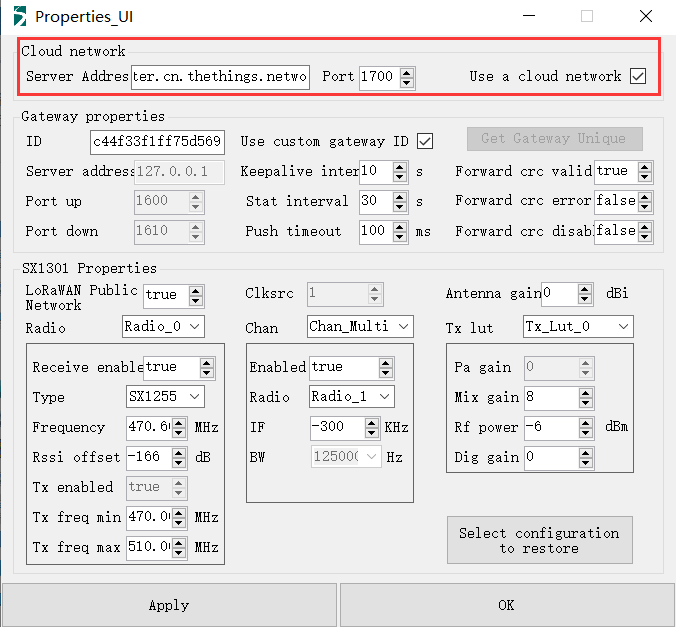
Click OK and Start Packet Forwarder.
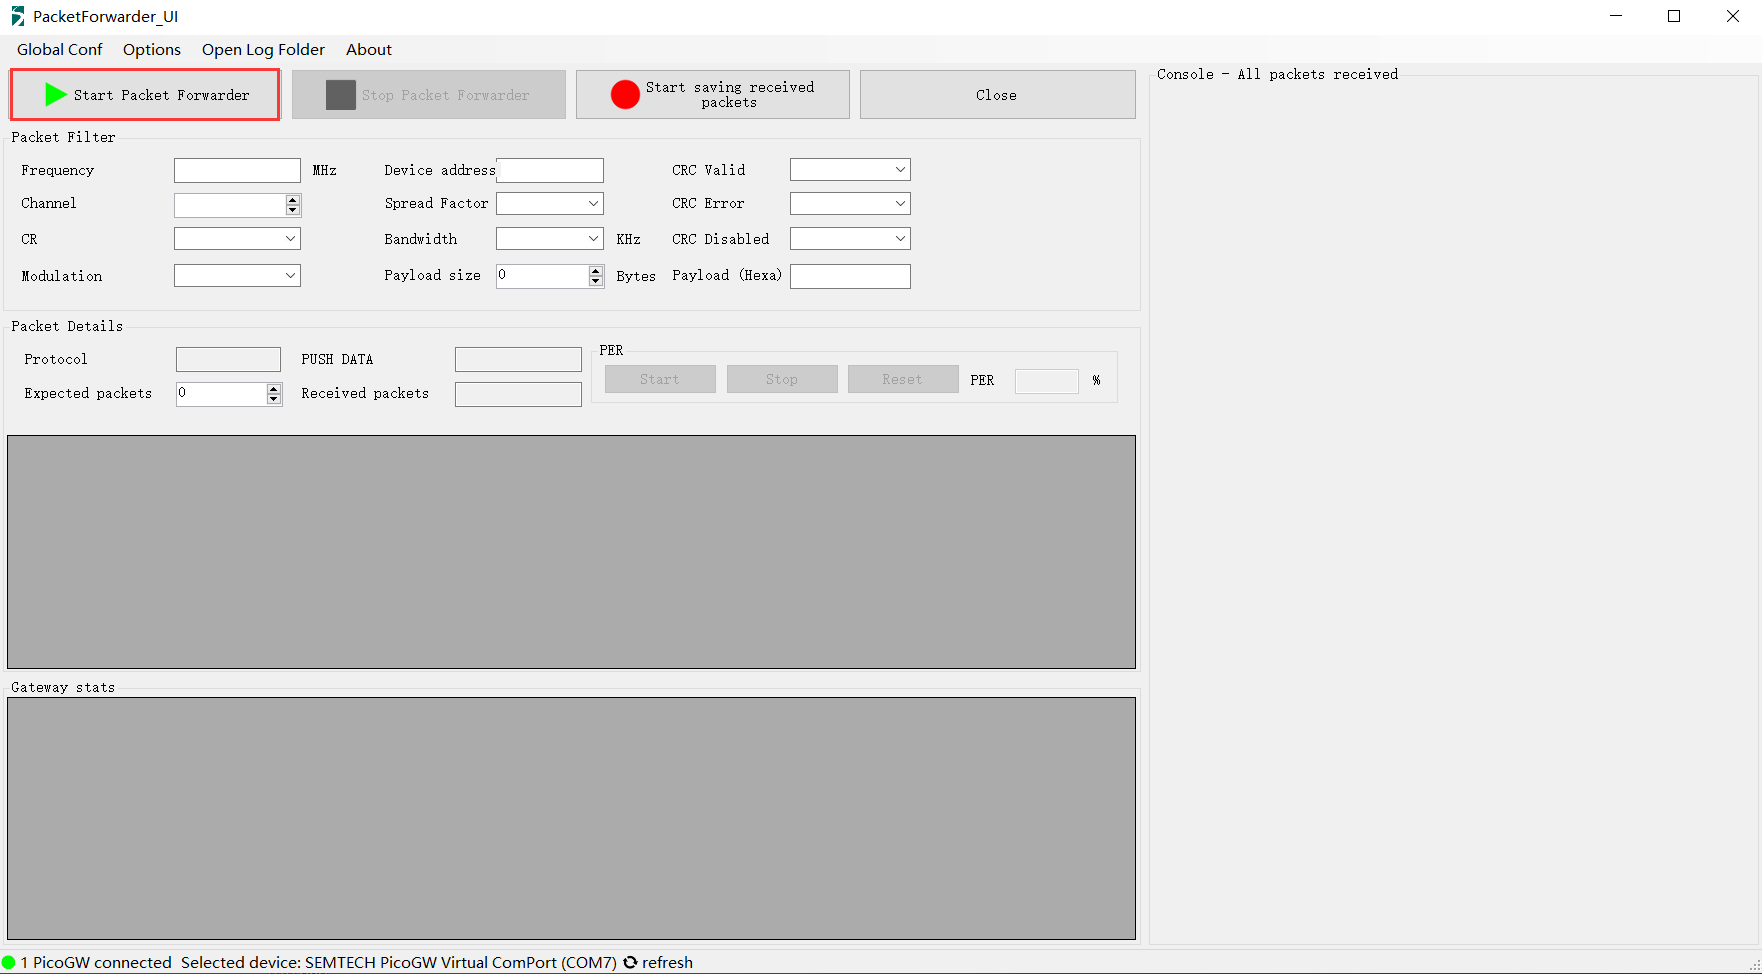
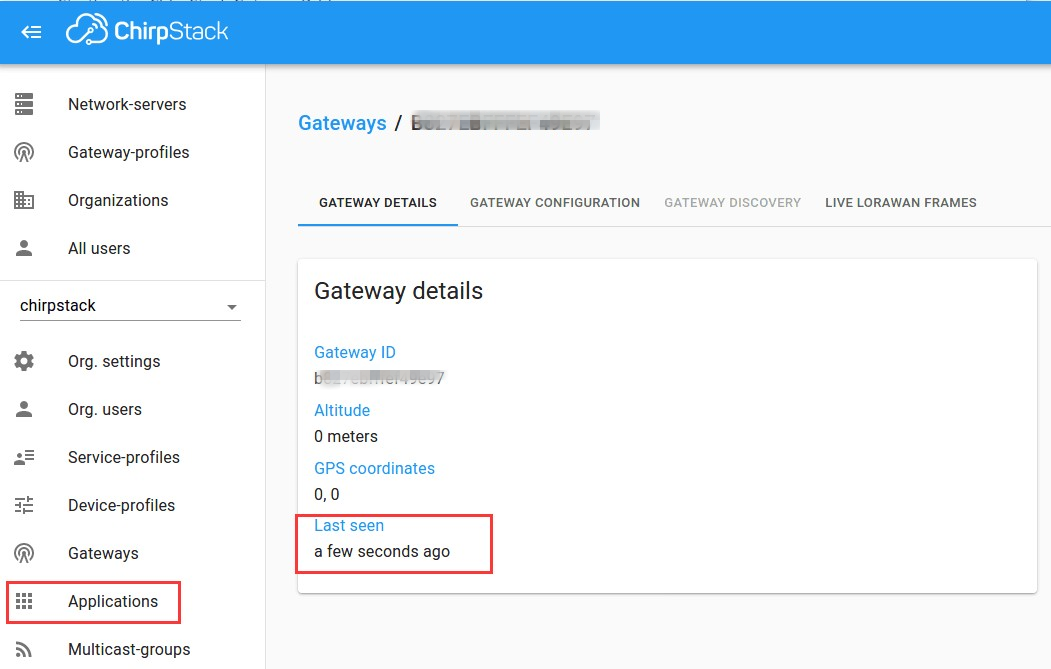
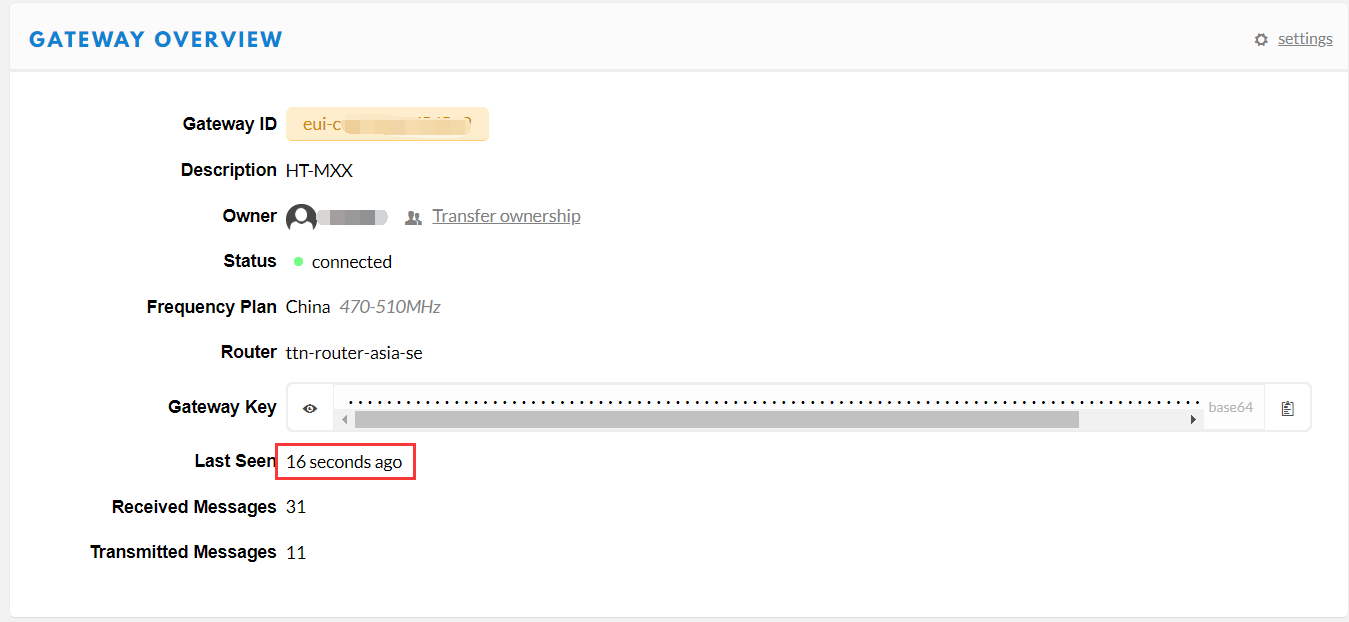
View gateway status, it is runing:
Connect to ChirpStack server
ChirpStack is the most popular LoRa server open source project, widely used in many fields, and also the best choise for a private LoRa server.
ChirpStack Installation guide: https://www.chirpstack.io/overview/
ChirpStack support forum: https://forum.chirpstack.io/
ChirpStack Gateway Bridge
One thing need attention! the ChirpStack need a special service named Gateway Bridge, which converts LoRa® Packet Forwarder protocols into a ChirpStack Network Server common data-format(JSON and Protobuf).
The Gateway Bridge service can running on the Raspberry Pi or the ChirpStack server. We recommend install it on the Raspberry Pi.
Install LoRa-gateway-bridge:
wget https://artifacts.loraserver.io/downloads/lora-gateway-bridge/lora-gateway-bridge_2.5.1_armhf.deb
#Download the LoRa-gateway-bridge package that supports the Raspberry Pi Zero_W version
sudo dpkg -i lora-gateway-bridge_2.5.1_armhf.deb
#Install LoRa-gateway-bridge
sudo systemctl start lora-gateway-bridge
#Start LoRa-gateway-bridge
sudo systemctl enable lora-gateway-bridge
#Set LoRa-gateway-bridge to boot up
Install ChirpStack Gateway Bridge can refer to https://www.chirpstack.io/gateway-bridge/install/debian
Starting the ChirpStack Gateway Bridge:
sudo systemctl start chirpstack-gateway-bridge
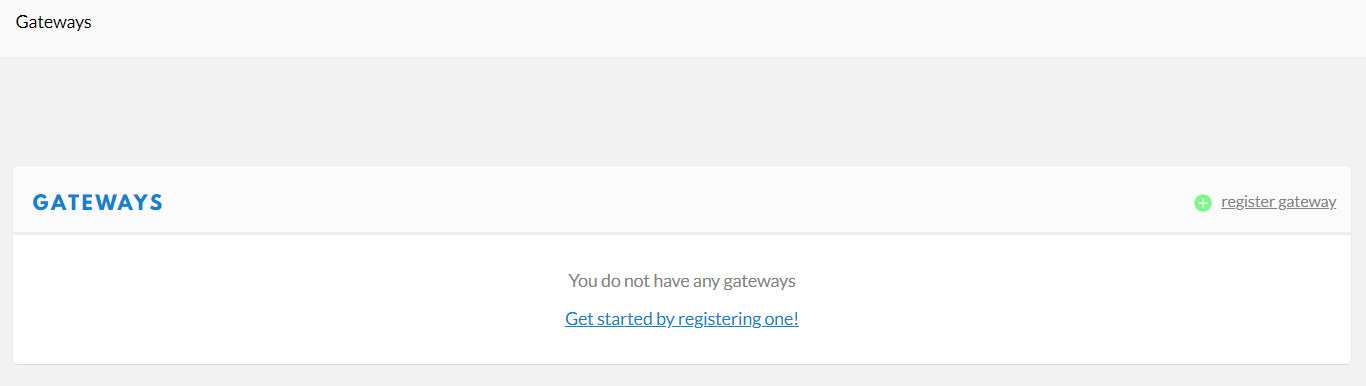
Register LoRa Gateway in ChirpStack
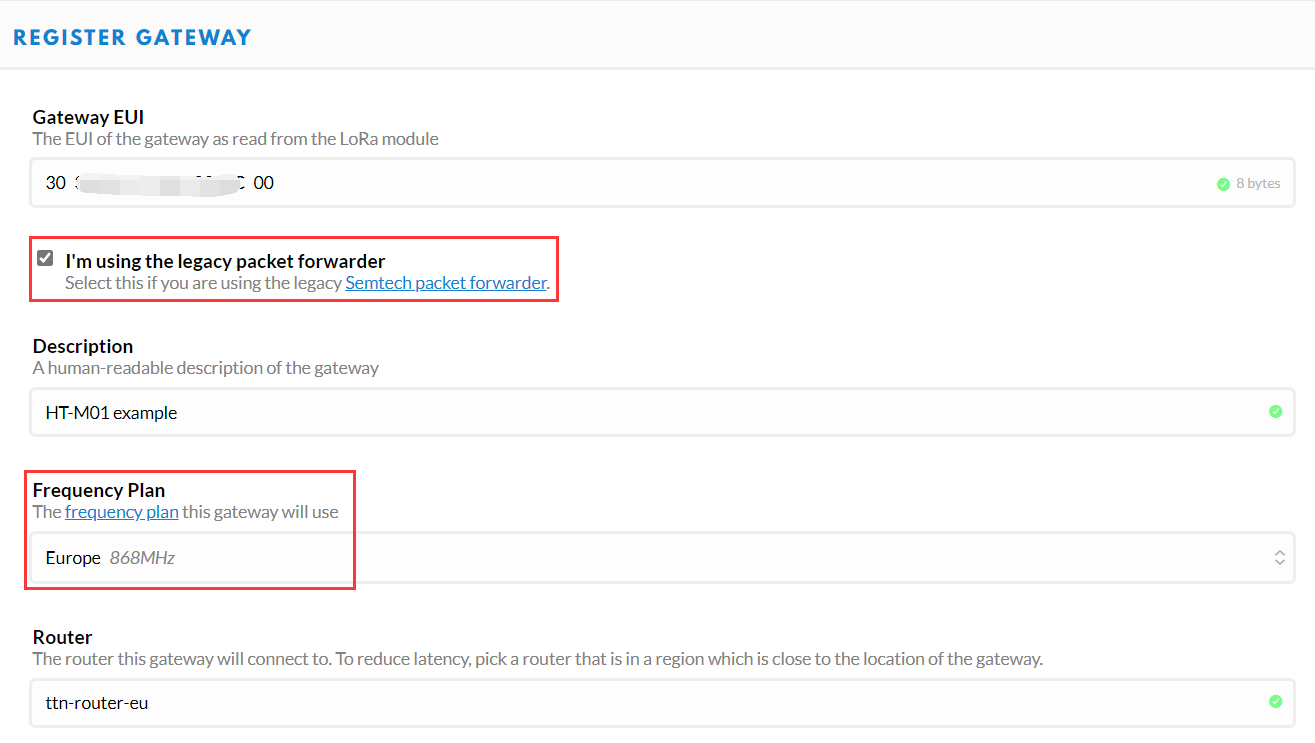
Fill in the HT-M01 information as shown below and complete the addition.
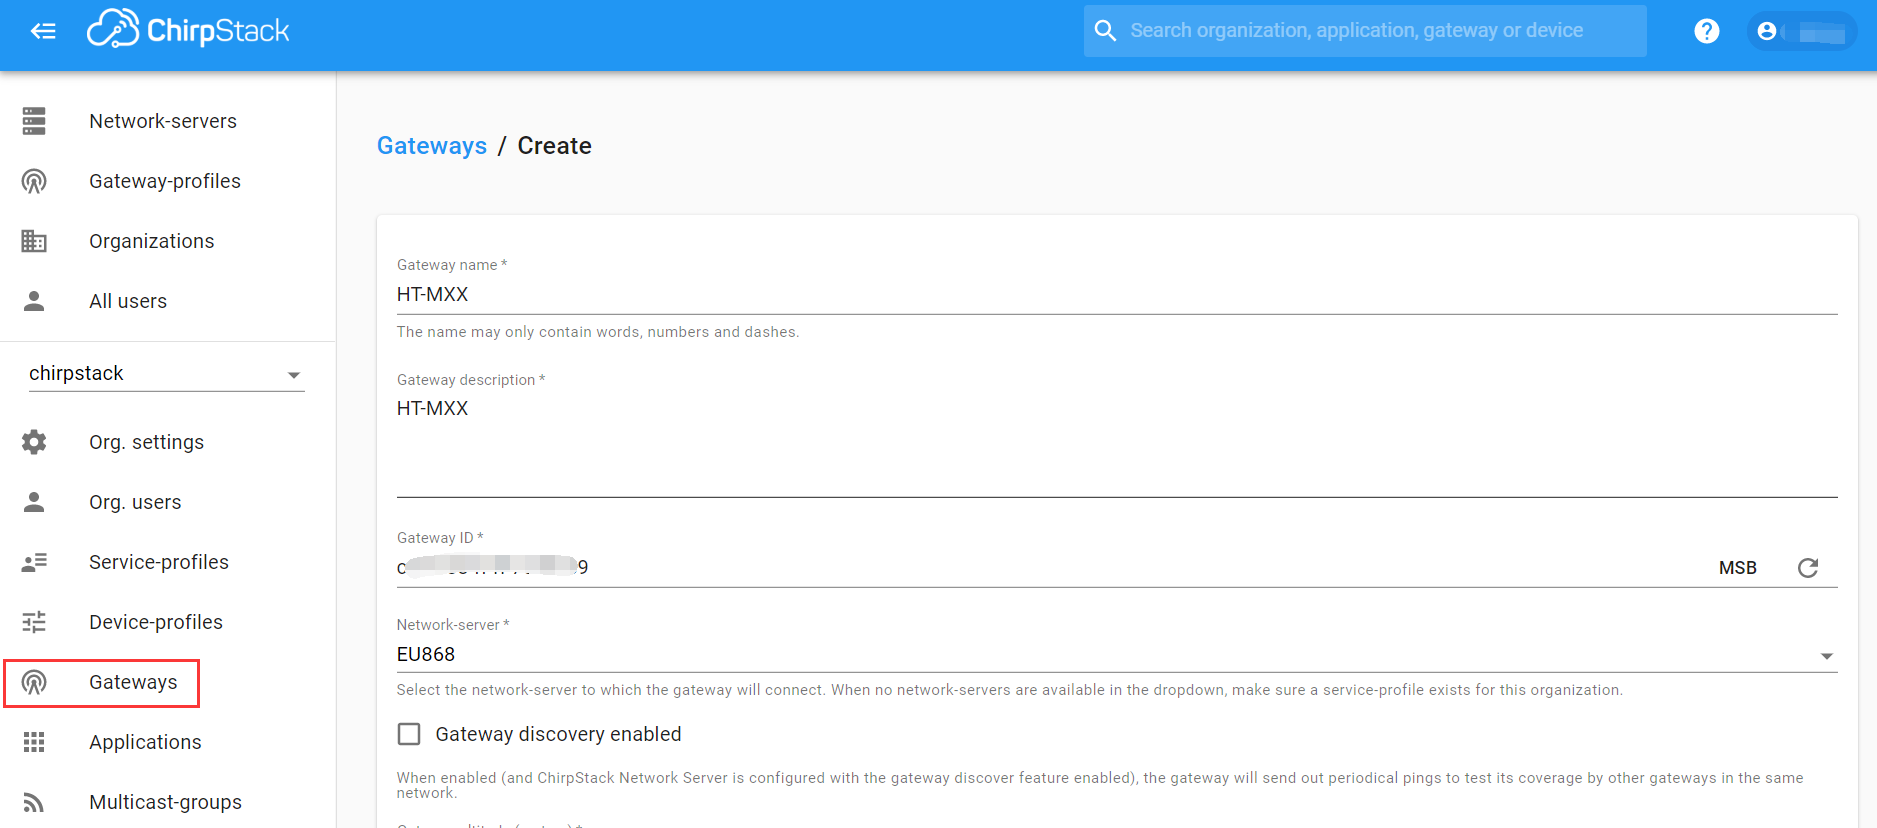
Gateway ID – The unique ID of HT-M01 gateway。
Connect to ChirpStack server
In the HT-M01 gateway, need to configure the gateway ID, server address and port.
HT-M01 in Linux (Raspberry Pi)
Fix parameters in global_conf.json:
nano /home/pi/lora/packet_forwarder/lora_pkt_fwd/global_conf.json
Configure gateway ID, server address, port. At the end of the global_conf.json, make these changes:
"gateway_ID":"XXXXXXXXXXXXXXXX", /*Your gateway ID, 16 characters*/
"server_address": "router.eu.thethings.network", /*The router addresses need matach your region*/
"serv_port_up": 1700,
"serv_port_down": 1700,
ctrl + O to save and ctrl + X to exit, and restart the service in Raspberry Pi:
sudo systemctl restart lrgateway
HT-M01 in Windows
Fill in the correct ID, server address, keep Port default 1700.
Click OK and Start Packet Forwarder.
View gateway status, it is runing: