LoRaWAN
This topic describes how to quickly get started with the LoRaWAN version of Capsule Sensor V3.
If you accidentally erase the code, please refer to the WirelessBoot theme:
Power On
Hold the button for 3 seconds until the white light comes on, then release the button.
Warning
The actual button is located at a small point in the very center of the key. There should be a clear pressing feedback when you press the button. If your finger cannot successfully press it, you can use your fingernail or a small tool to assist.
Warning
It is recommended to connect the device to a charging cable during the first startup to prevent it from failing to operate due to a lack of power.

Configuration
If you use one-click registration and do not need to modify configuration parameters, please skip this step.
Press the key three times quickly until the white LED and the blue LED light up at the same time and start flashing quickly. At this time, the device enters the configuration mode.
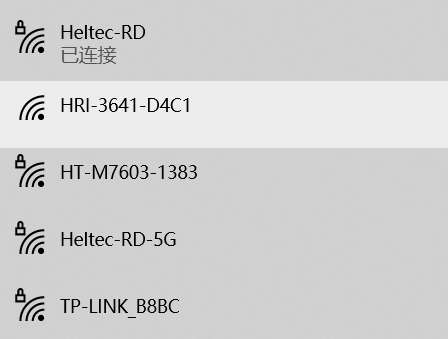
Use your phone or computer to search for the device’s WiFi hotspot: HRI-3641_XXXX. Connect to this WiFi with the password: Heltec.org.
Once the connection is successful, visit 192.168.4.1 in your browser.

The parameters are described as follows, this determines the operating state of the device and displays the information required to activate the device on the server:
Parameters
Description
REGION
LoRaWAN band, which must be consistent with the gateway
CLASS
Working mode, support Class_A or Class_C
OTAA/ABP
Network access mode
ADR
Data rate adaptation
DR
Data rate
Confirm
Uplink message received confirmed
DEVEUI
A 64 bit extended unique identifier for your end device.
APPEUI
AppEUl (JoinEUI) is a 64 bit extended unique identifier used to identify the Join
Server during activation.APPKEY
An end device specific encryption key used during OTA
Channel
LoRaWAN channel
Interval(S)
LoRaWAN transmission interval
Retry
Number of retransmission attempts by LoRaWAN
Product
Product model
Firmware
Firmware version
Battery
Battery level
Charge
Whether to charge
Once configured, click
Summitto submit. Press the device button, the white light will blink once, the device has started to work.
Note
The device has no action in configuration mode and will restart automatically after 10 minutes.
Connecting to LoRa server
Before that, make sure your LoRa gateway is registered with the relevant server and is working well. Make sure the gateway’s channel and frequency band to match the Capsule Sensor.
One-click scan and register on SnapEmu
Note
Only devices with the LoRaWAN program already installed at the factory can use the one-click code scanning registration function. If you refresh your firmware, or modify device parameters, please use Manual registration.
Note
Only for SnapEmu.
Install SnapEmu App.
Open SnapEmu, click the
+in the upper right corner, selectSCAN.

Scan the device QR code.

Fill in the device
groupandDescription, then clickAdd Device.

Return to the APP home page and wait a few moments, the device is activated. Once the device has collected six data points, it can plot them by selecting hours, days, or weeks as units.

Tip
Refresh the page method: Press and hold the area in the diagram to drop down. Once the device has collected six data points, it can plot them by selecting hours, days, or weeks as units.
Manual Registration
Go to the Capsule Sensor configuration page to obtain relevant information and register the device just like any other general LoRaWAN device. You can refer to this link: Connect “ESP32 + LoRa” to LoRaWAN Server