How to programming a ESP32 Module
This document uses Wireless_ Shell as an example.
Hardware Connection
Wireless_ Shell only have ESP32 and RF relevant circute inside. In order to program it, need connect to a external UART-USB bridge. CH340G, CP2102 etc. Here are three common circuit connection methods:
Using the Heltec Esp32 Dev Backplane For first-time users who want to test the module’s performance, you can directly purchase a backplane. If you are unable to solder, Heltec staff can pre-solder it for you.

Designing Your Own Circuit You can refer to the HT-CT62 Recommend circuit to design and fabricate your own PCB.
For Large-Scale Programming Without a Backplane Users who need to program modules in bulk without using a backplane can contact Heltec’s official technical support to purchase the HT-CT62 dedicated fixture: support@heltec.cn
Preparation
Install the ESP32 development framework correctly: Heltec ESP32 Series Quick Start — esp32 latest documentation;
Connect your redesigned board to a computer, make sure useing a high quality Micro USB cable;
Use the serial port debugging assistant to open the serial port and check whether the serial port can print information normally.

Program via Arduino IDE
Open Arduino, select “Tools” ->”Board” ->”Wireless mini shell”

Select the port.
You can select the corresponding example in the sample library.

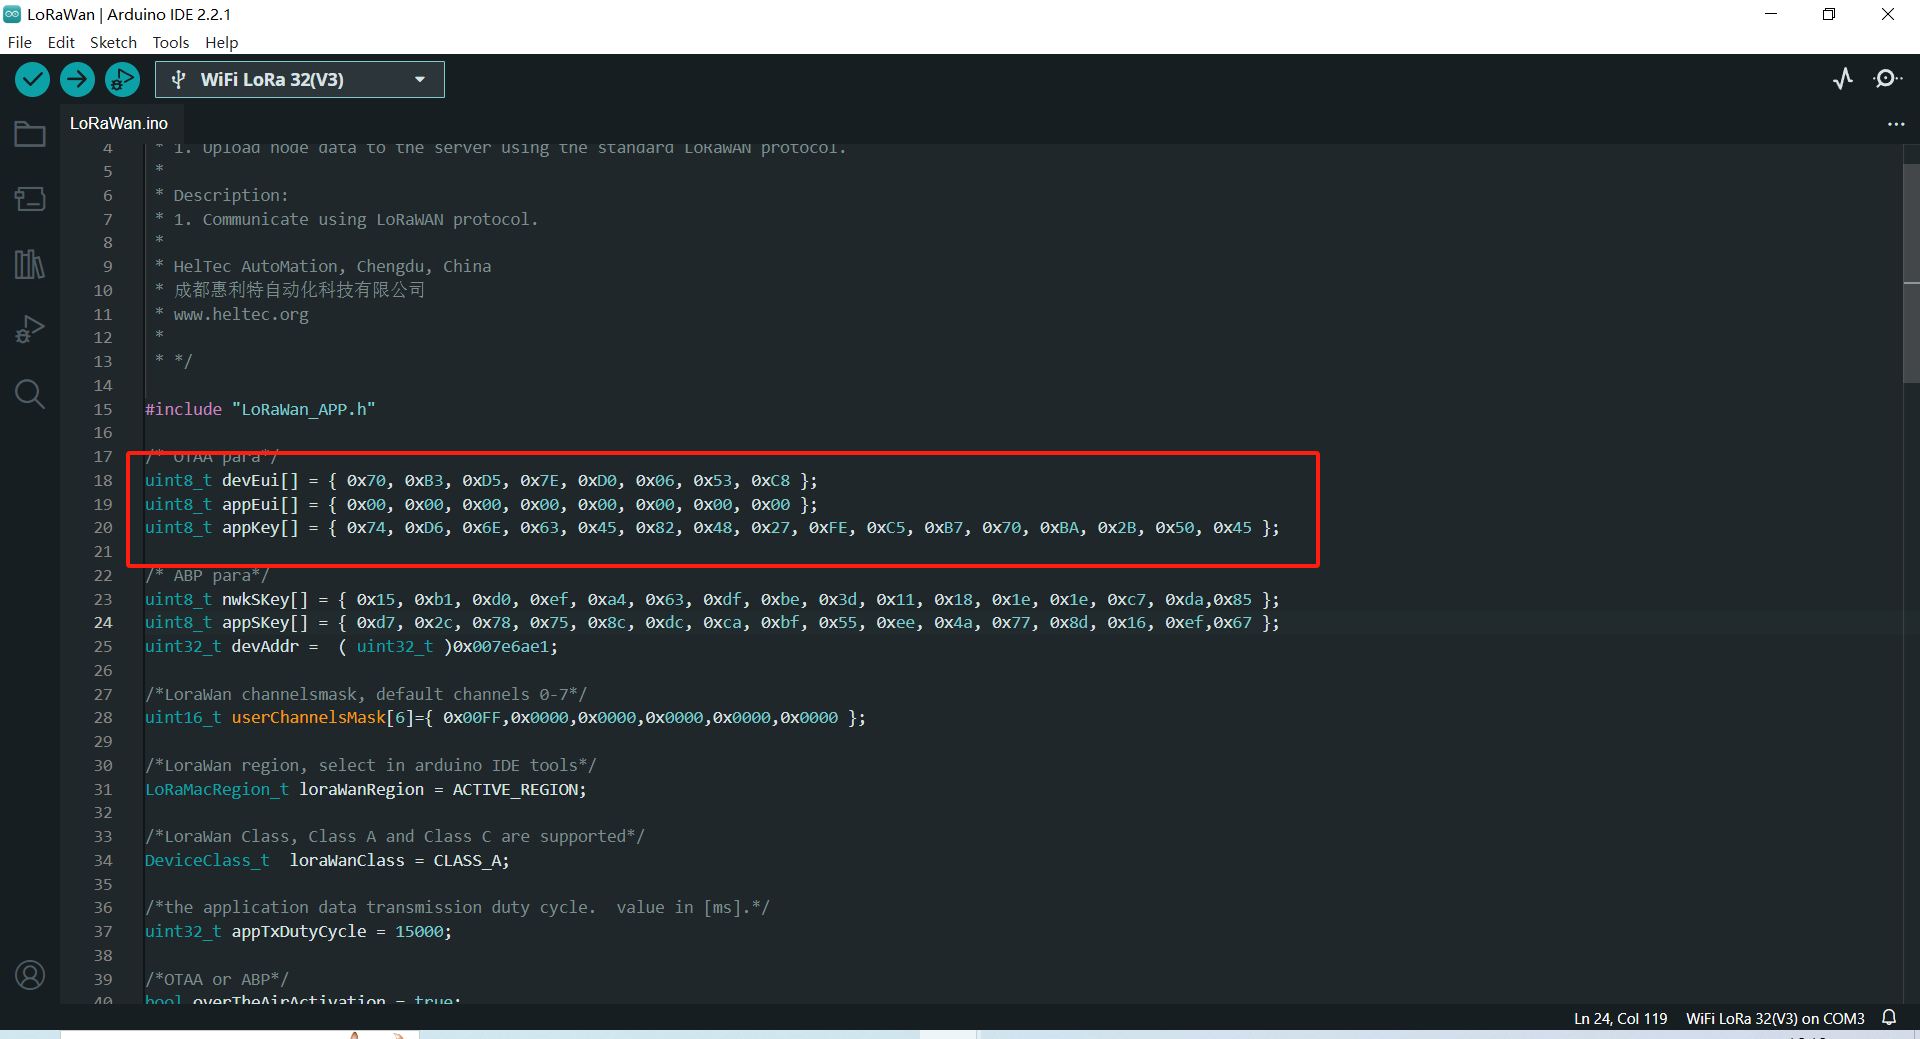
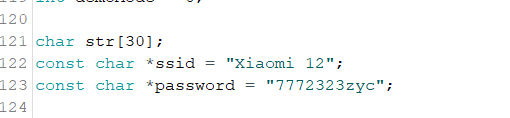
You can also write your own code in the
New Sketch.
Click to
Upload.