Wireless Bridge WiFi_LoRa 例程用户手册
This is an example of communication between a LoRaWAN server and a WiFi device. You can write code that fits your needs based on this example.

Preparation
Hardware
LoRaWAN Gateway in normal operation on the LoRaWAN server.
Micro USB cable.
Software
Heltec ESP32 development framework and library, If you don’t know how to install, you can refer to this link:Heltec ESP32 Series Quickstart
小技巧
It also supports the official Arduino framework of Espressif.
Uploading code
Connect Wireless Bridge to your computer with a USB cable and open the Arduino IDE.
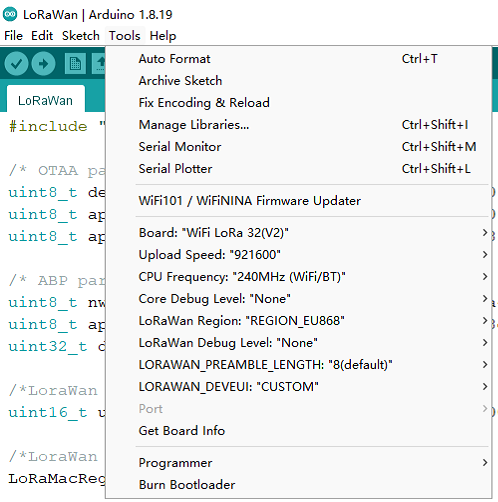
Click
Tools, selectWireless Bridge. ToRegionoption based on your needs, both hardware support and the ability to communicate with the gateway.
Follow the path shown to open the example “LoRaWANWiFi”

Modify the relevant parameters, mainly those related to WiFi and LoRa. Try not to use the default EUI; it’s probably already taken.

Please note that the ‘Channel’ is set to be the same as the gateway.
小技巧
The default frequency band is 0~ 7. If you don’t know how to set the frequency band, you can check this link:LoRaWAN example Sub-Band usage

The payload is located here:

Uploading code.
Registering devices
Registering Gateway
Please make sure that your gateway is running correctly on the LoRaWAN server. Here is the documentation for the common Heltec gateways:
Registering Wireless Bidge
According to the information such as EUI in the code, the node is registered at the server. If you don’t know how to register, follow this link:
https://docs.heltec.org/en/node/esp32/esp32_general_docs/lorawan/connect_to_gateway.html
用法
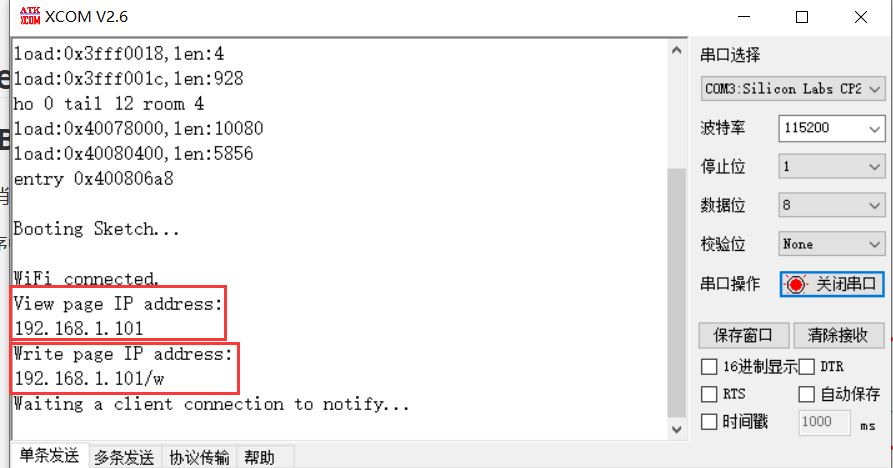
将程序上传到开发板后,打开串行端口以查看网页的IP地址. 其中,”View page IP address”是用于将LoRa信息转发到WiFi的查看网页,而”Write page IP address”是用于将WiFi信息转发到LoRa的发送网页. 打开网页的设备必须与Wireless_Bridge位于同一局域网中.

Uplink
通过LoRa发送信息,接收到的数据将通过WiFi显示在网页上. 默认的网页刷新时间为10S,可以根据特定需要在 “setTimeout”函数中修改网页刷新时间.

网页发布的信息将转发到LoRa,并且可以在节点数据中查看. 转发到LoRa的信息需要相应地进行解码.
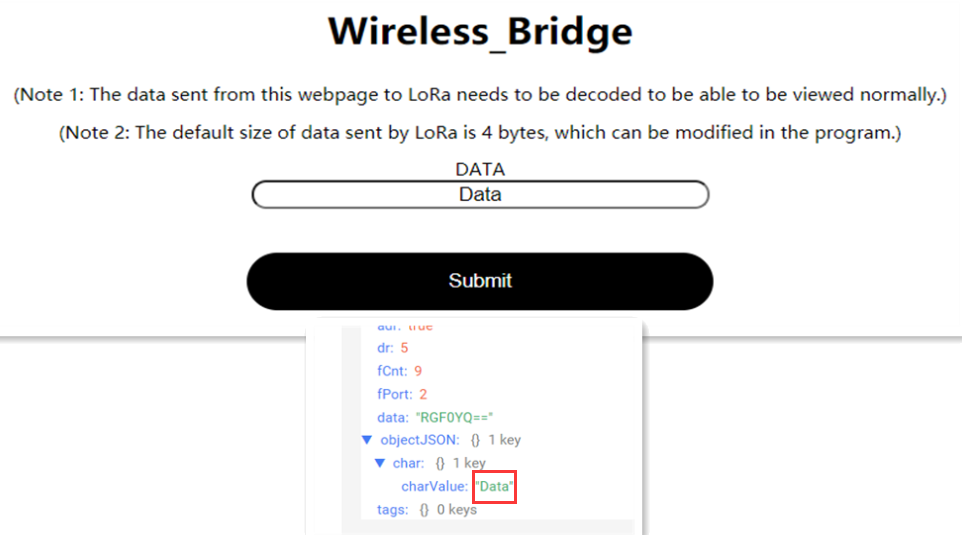
该示例的相应解码如下:
function Decode(fPort, bytes) {
  var charValue1= String.fromCharCode(bytes[0]);
  var charValue2= String.fromCharCode(bytes[1]);
  var charValue3= String.fromCharCode(bytes[2]);
  var charValue4= String.fromCharCode(bytes[3]);
  var charValue= charValue1 + charValue2 + charValue3 + charValue4;
  var result={

                                                "char":{
                                                "charValue":charValue,
                                                       }
  }
  return result;
}